
I was ridiculously excited when I found an extra-large dog house on Craigslist for $50.
It wasn’t one of those flimsy, falling-apart ones either. Whoever built this thing actually knew what they were doing. It had a solid structure, a good roof, and—of all things—a heated floor with a coil embedded in cement.
Which sounds amazing… until you try to move it.
That thing was so heavy it took three grown men to get it into place, and I’m pretty sure we were all wondering if someone was going to end up with a hernia before it was over.
But once it was in place, I knew I had something to work with. The size was perfect, the structure was solid, and with a few changes, it had the potential to become a really functional chicken coop.
Inside My Chicken Coop: Quick Overview
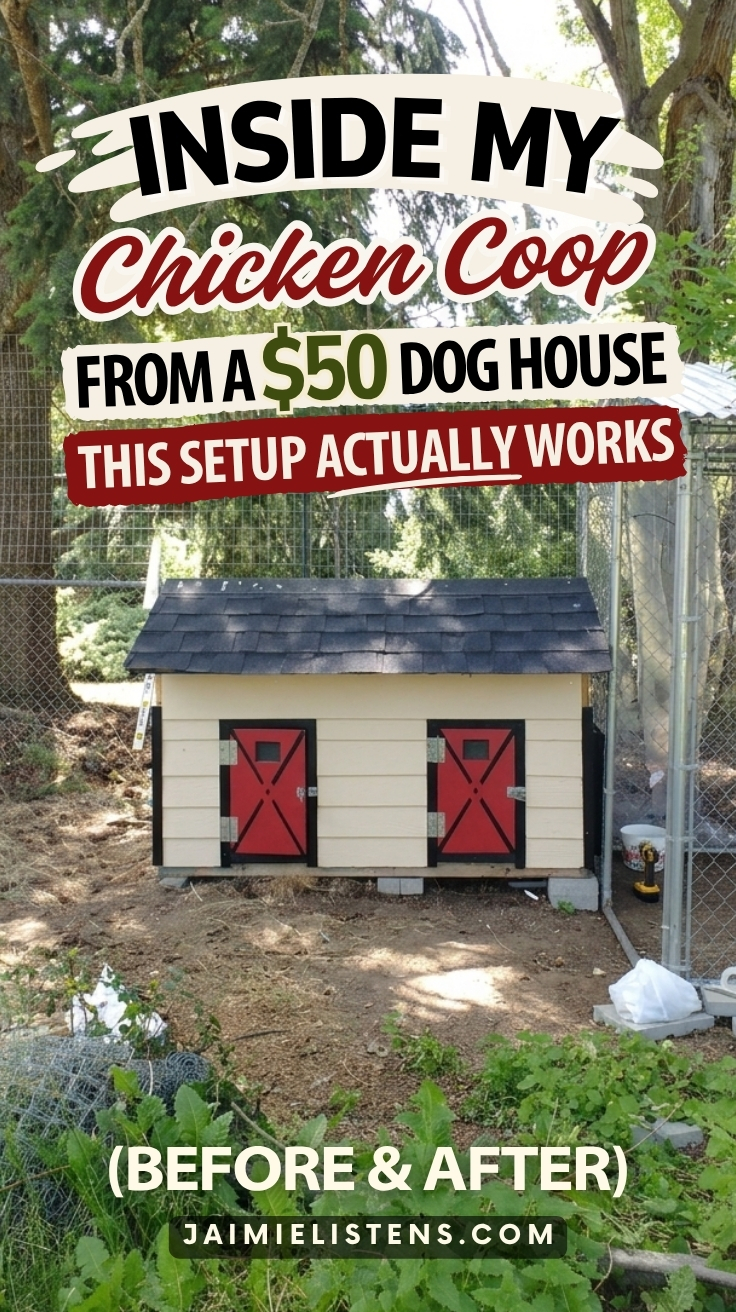
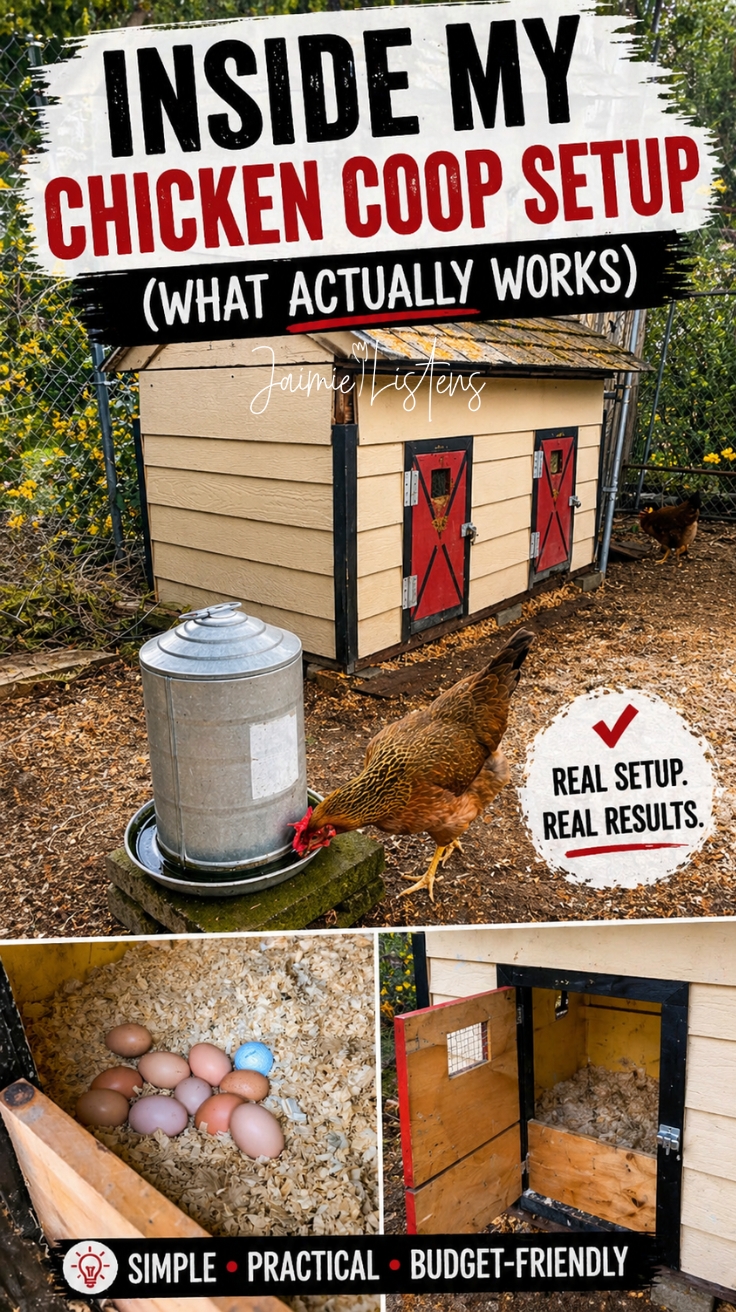
This post is a full before-and-after tour of how I turned a $50 Craigslist dog house into a surprisingly functional chicken coop. It’s not fancy, but it’s practical—the kind of setup that makes daily chores faster, egg collection easier, and cleanup way less annoying.
I’ll walk you through what the dog house looked like before we touched it, what we changed to make it secure and chicken-friendly, and what the inside layout looks like now (roosting, nesting, clean-out, ventilation). Then I’ll share what I’d tweak after living with it—because chickens always have opinions.
Alright—let me show you what we started with.
Before the DIY Chicken Coop Conversion: The $50 Dog House
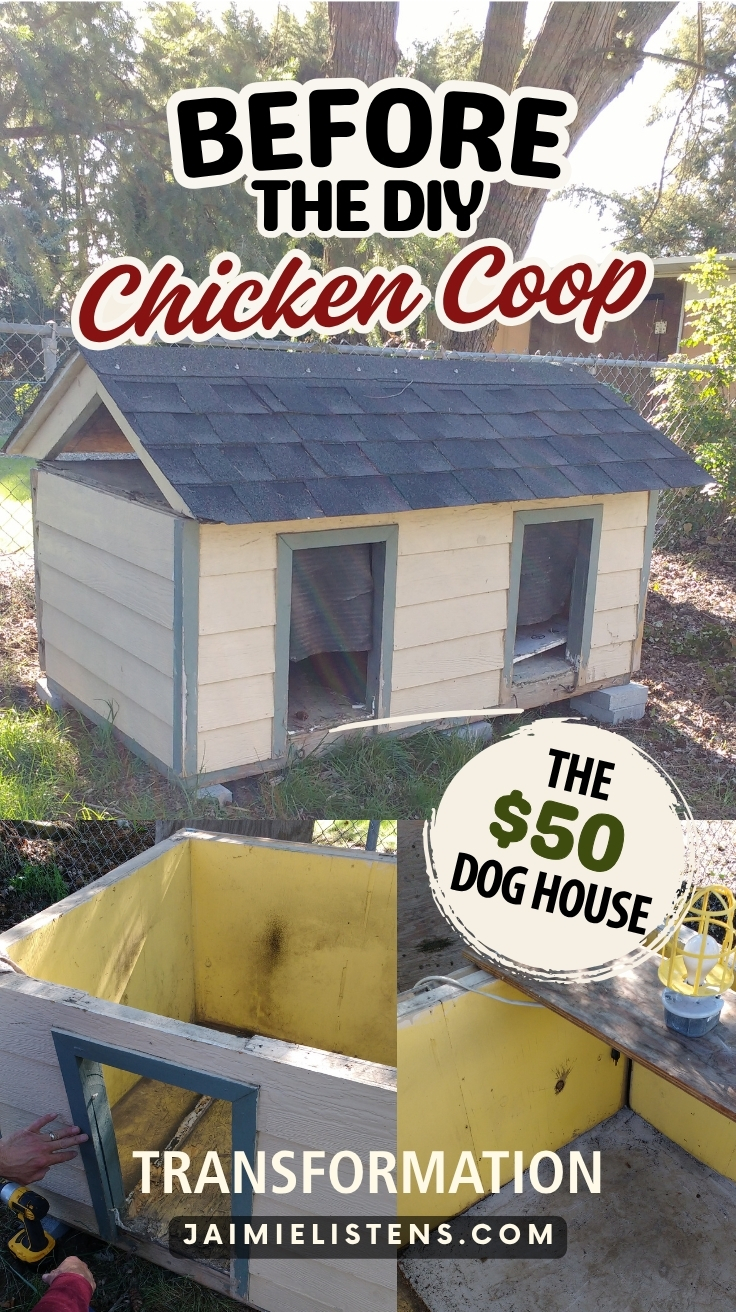
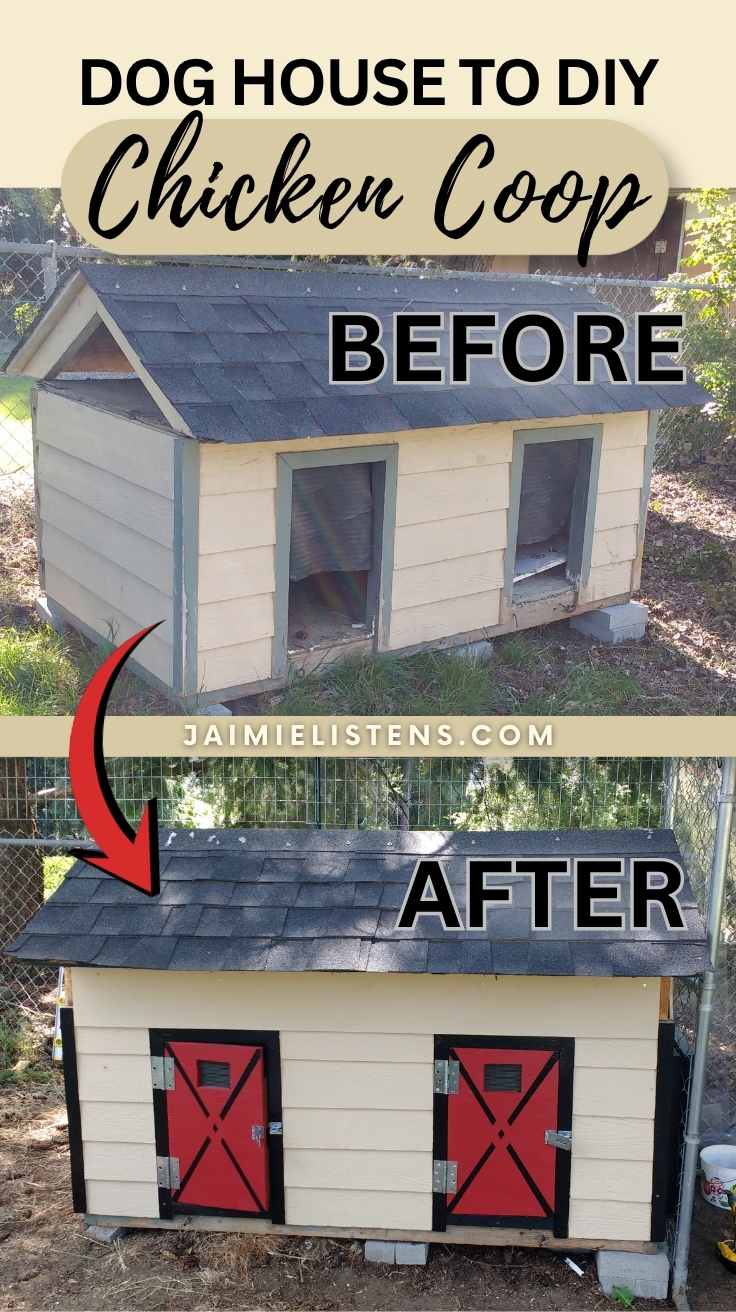
Before we touched anything, this thing was very clearly a dog house.
It was about 3 feet deep by 6 feet wide on the outside, and 46 inches tall at the roof peak. Inside, between the floor and the plywood ceiling it was about 2.5 feet tall, which gave me roughly 15.5 square feet of floor space to work with.
It had two front entrances with no doors, and the inside was plenty dirty. It needed a good clean-out before anything else.
The roof was just a piece of plywood laid across the top and screwed down, but the whole thing was framed as a separate structure that could be lifted off pretty easily with two people.
Under the roof, it even had a built-in light socket with one of those plastic caged lights. I’ll be honest, I was tempted to keep it. But between the wiring and the unknowns, it felt like a fire risk waiting to happen, so that had to go.
The wild part was the floor!
This thing had a heated floor. An actual heat coil encased in cement. Total luxury.
And for our winters, I knew that was going to be a huge advantage. It also felt a lot safer than trying to rig up heat lamps later.
So structurally, it was solid. It had potential. But it definitely wasn’t ready for chickens yet.
I had six baby Buff Orpingtons at the time, and I was fully determined to make this work for all six of their fat, feathery butts without creating new problems.
Which meant I had to figure out how to turn this into a functional setup where everything had a place and actually worked for daily use.
How I Turned a Dog House Into a DIY Chicken Coop
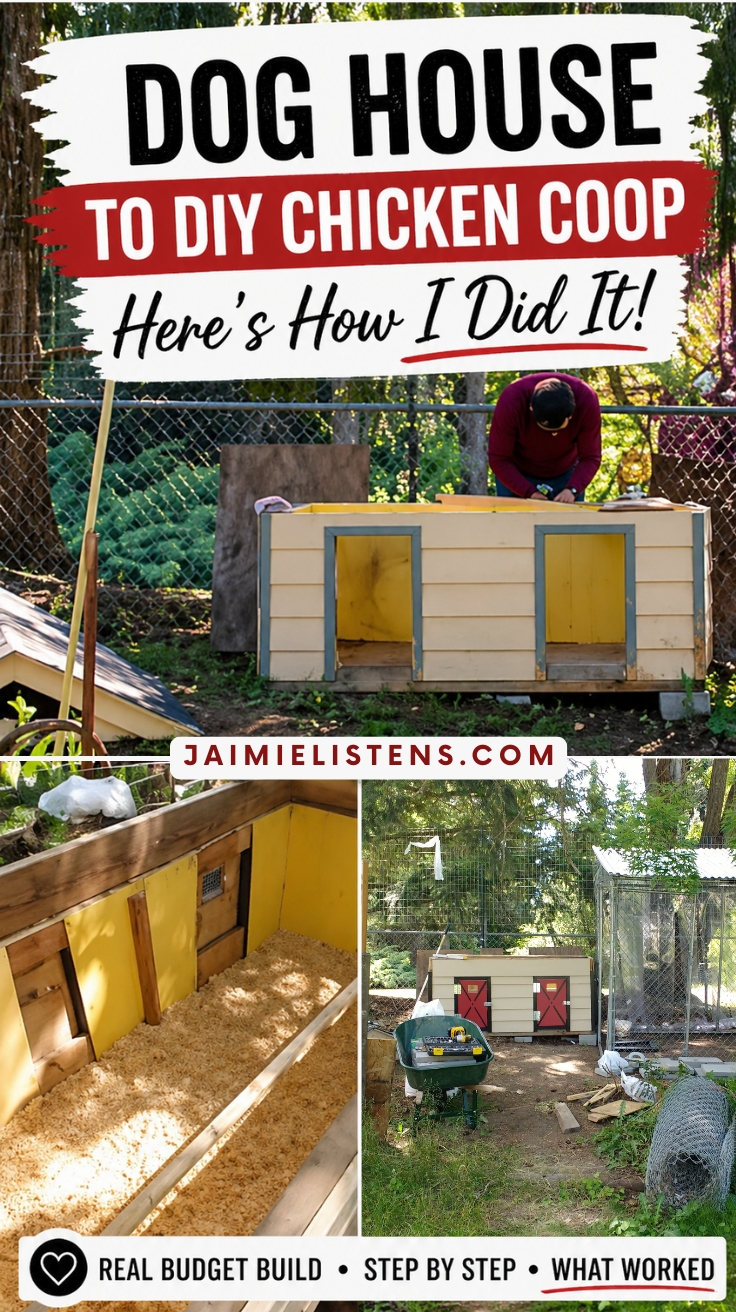
Once it was cleaned out, I had to figure out how to make this actually work for chickens.
The first issue was the two open entrances on the front. Chickens can’t just have open access like that, especially at night. So those needed doors. Something simple, but secure enough to keep predators out.
The goal was simple: secure the two front openings, add one side door into the run, and set the inside up so it was easy to clean.
For the inside layout I needed just a few chicken basics:
- a place to roost
- a place to lay eggs
- a setup that’s easy to clean
So I started there.
I knew I needed to add a roost bar, but placement was going to matter. It had to be high enough that they would actually use it, but still realistic for them to reach without launching themselves into the ceiling. Buff Orpingtons are not exactly known for their athleticism, so everything had to be practical.
Next was figuring out the nesting situation.
I had to think through where they would lay and how to make that space accessible without it getting in the way of everything else. Chickens don’t need anything fancy, but they do need it to make sense.
The floor, thankfully, was already taken care of. That heated concrete base meant I didn’t have to rely on heat lamps, which I was more than happy to avoid.
From there, it really came down to making small decisions and being willing to adjust based on how the chickens actually used the space.
Because what you think will work… and what chickens actually do… are usually not the same thing.
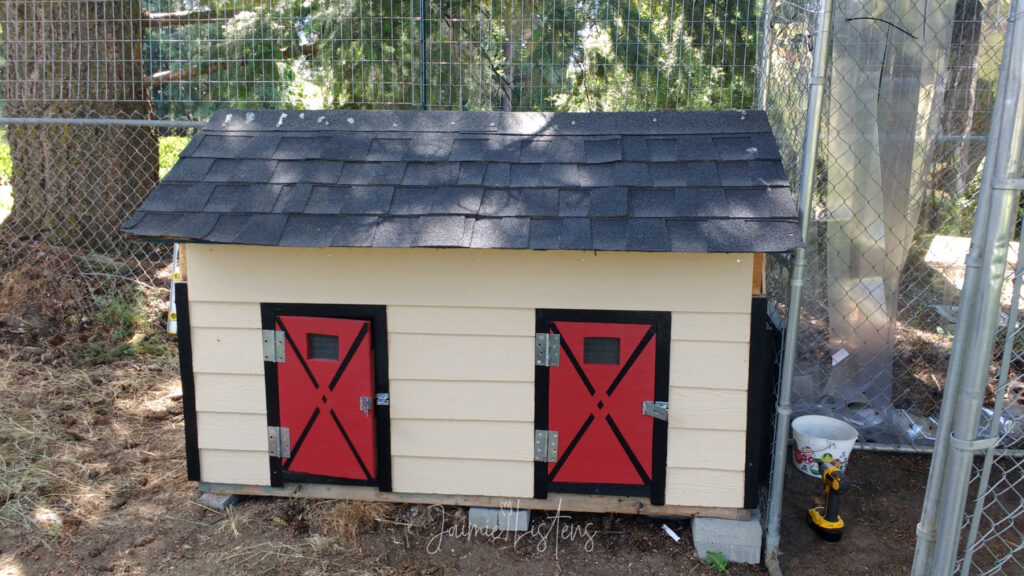
After: The Finished Chicken Coop Layout

Once everything was finished, this setup ended up being simple, functional, and honestly a lot more effective than I expected.
It’s not fancy, but it’s the kind of setup that makes chores faster, egg collection easier, and predators way less exciting.
The coop has two front doors attached to the front openings that make it easy to access the inside for cleaning and egg collection, plus an added side door that connects directly to the run.
Inside, the roost bar is placed along the back wall to keep droppings away from where the chickens lay. Instead of traditional nesting boxes, the hens use corner nests in the bedding, which ended up working just fine.
The floor is lined with shavings, held in place near the doors with removable boards, which makes clean-out much easier than trying to scoop everything out through a small opening.
Ventilation comes from small windows covered with hardware cloth, giving airflow without compromising safety.
The coop connects directly to a reinforced dog run.
It’s not fancy, but it works. And more importantly, it works in real life.
Estimated Cost Breakdown (Dog House Coop Conversion)
- Craigslist dog house: $50
- Lumber/trim for doors + frame: $0 (used scrap)
- Hinges + latches: $45
- Hardware cloth + screws/washers: $0 (already had)
- Misc. fasteners (U-nails, heavy-duty screws): $15
- Red and black paint for doors and trim: $0 (already had)
Estimated total out-of-pocket for coop: $110
Run upgrades (dog kennel run)
- Used dog kennel: $0 (already had)
- Bricks/pavers for digging barrier: $20
- Wire fencing for top: $0 (already had)
- Pipe for roof support w/hardware: $115
- Plastic roofing panels: $90
- Warehouse strip curtains (windbreak): $0 (free)
Estimated total out-of-pocket for run: $225
Estimated total out-of-pocket: $335
Real talk: This only stayed cheap because we scavenged and repurposed a bunch of materials. If I had to buy everything new, it would’ve gotten expensive fast. I’m a “use what you have and make it work” person, always.
Inside My Chicken Coop Setup (What Actually Works)
Now here’s what that layout looks like in real life — the parts that mattered most day to day.
For the roost bar, I gave the chickens about double their roost height for jumping space. I did not want them launching themselves up there and thumping their heads on the roof like feathered pinballs.
I also realized pretty quickly that traditional nesting boxes were not going to fit well.
I could have cut holes in the side and tried to build nesting boxes out from the outside, but at that point, it felt like I would be sacrificing what made this dog house so unique. If I had to rebuild the whole thing around nesting boxes, I might as well have started from scratch.
I kept the nest box setup simple.
Instead of boxes, I scooped little nest areas right into the bedding in the corners near the two front doors. That gave them a place to lay right on the floor without taking up extra space. Added bonus was the easy reach from the doors.
I placed the roost bar toward the back of the coop so they would not be pooping directly over the eggs. Because chickens are many things, but considerate bathroom planners are not one of them.
For cleaning, I used 10-inch wood pieces to hold the shavings in place at the doors. The boards slide between four nails, so when it is time to clean the coop, I can pull the boards out and rake or scoop the bedding right out through the doors.
I also added a lockable entrance and exit door on the side of the coop.
The coop is connected to the run at that door.
That door frame is what connects it to the fortified dog kennel we already had sitting unused in the backyard.
It works like this: Trim is attached around the coop side door, a hole in the kennel is cut to fit slightly smaller than the trim. Then the kennel is attached with heavy-duty screws and U-shaped nails. After that, another piece of trim (matching the first) is attached on the other side.
Trim → kennel → trim.
On the front, I added two doors with locking latches so I could access the inside easily. I also added small ventilation windows, about 4 inches by 4 inches, covered from the back with sturdy hardware cloth. I screwed the hardware cloth down well with screws and washers so it would actually hold.
The chicken run got its own upgrades too.
We put brick all the way around the outside of the repurposed dog kennel to help prevent predator digging. We added pipe for roof support on top of the kennel. Then we secured wire fencing over the top, then attached plastic roofing panels to help protect the run from rain and snow.
My husband also brought home some of those plastic strips used in warehouse doorways, so we used them along the back side of the kennel as a wind break.
For the side entrance, we used a piece of board as a ramp. Honestly, the chickens did not really need it. They had no problem hopping in and out on their own.
Apparently Buff Orpingtons are only dramatic when it suits them.
What I’d Do Differently (After Living With It)
Overall, this setup worked better than I expected, but there are a few things I’m still tweaking.
Chicken feed and water are the ongoing battle.
Keeping feed contained and not attracting mice is a constant work in progress. Same with water. Between dirt, shavings, and winter freezing, it’s one of those things every chicken owner ends up experimenting with. I’ve tried enough different setups at this point that it could easily be its own blog post.
What surprised me the most was the nesting situation.
I didn’t end up using traditional nesting boxes, and I wasn’t sure how that was going to go. But the chickens were perfectly happy laying right in the corners of the coop in the bedding.
Using the old golf ball trick where you want them to lay definitely helped them get the right idea. Once a couple of them started laying there, the rest followed along without any issues.
And that heated floor? We did test it and carefully. We plugged it in and used a temperature gun repeatedly over a 24 hour period to check how hot the floor was getting. It got hot enough to keep them from freezing, but never hot enough to bake them or start a fire.
Disclaimer: We tested it carefully and kept safety in mind — and if you’re ever dealing with unknown wiring, it’s worth getting a pro’s eyes on it.
Now for a major chicken coop predator test.
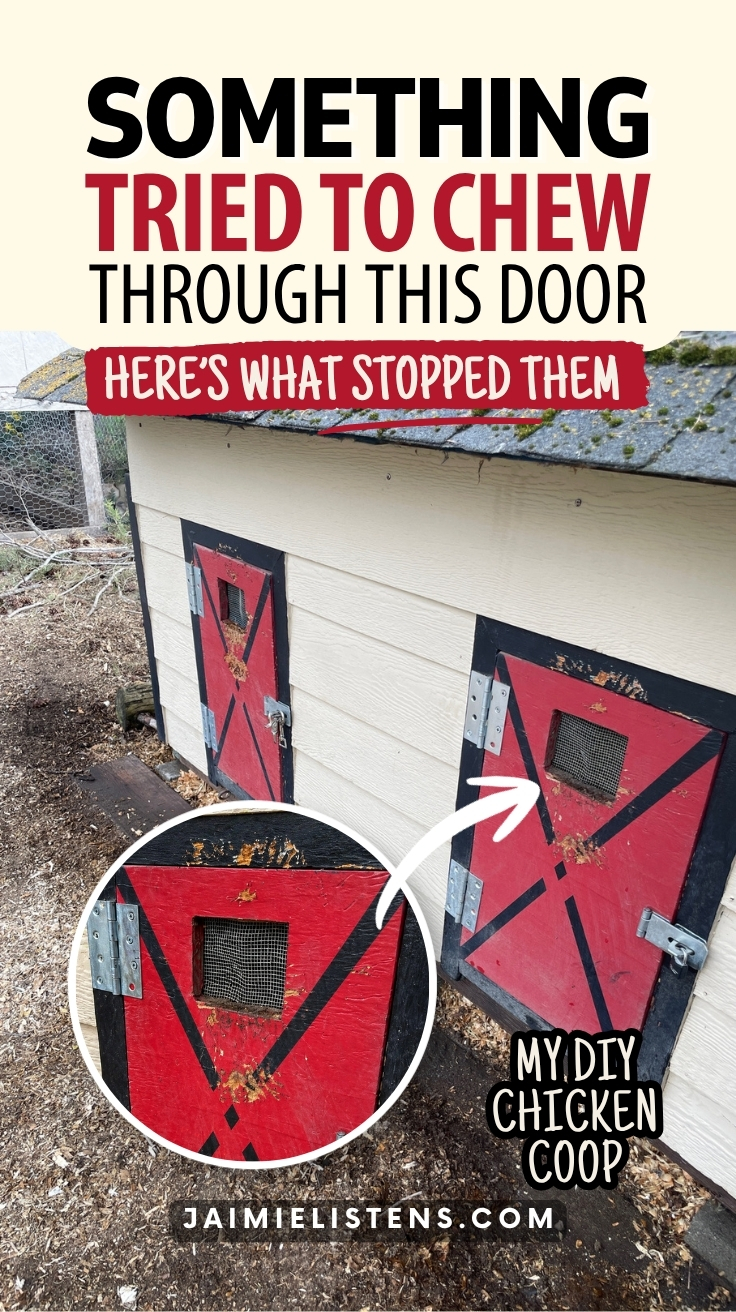
What I didn’t expect at all was how well this setup would hold up under pressure.
At one point, we had a full-blown large dog attack in our fenced backyard, completely out of the blue. And this coop, along with the run setup, held.
Turns out, a dog run and dog house can work both ways: they can keep dogs in, and if you build them right, they can help keep dogs out.
The best design decision that saved my girls was keeping the ventilation windows small and covering them with strong hardware cloth secured with sturdy screws and washers.
The dogs could chew at the solid wood doors, but the openings were too small for them to get a good grip with their teeth. And because the hardware cloth stayed firmly in place, they couldn’t push it off and create a better weak spot.
That’s a whole story on its own, but it definitely proved that this wasn’t just a “good enough” setup. It actually worked when it mattered.
Final Thoughts on This DIY Dog House Chicken Coop
This was my third chicken coop build, and it was definitely worth it. A little labor and $335 for a coop + run that safely housed six chickens was a total bargain.
Every build teaches you something, and this one really hit that balance of simple, functional, and actually holding up to real life.
The biggest downside for me is refilling the bedding.
Cleaning it out is pretty straightforward. I can rake everything out with a hoe and get it cleared pretty well. But getting fresh bedding back in through the smaller doors is a little more tedious than I’d like.
At this point, I’ve seriously considered filling up my shop vac with shavings and running it in reverse to blow the new bedding in.
I haven’t tried it yet… but it’s not off the table.
One thing I really love about this setup is that I didn’t permanently commit it to being a chicken coop.
I modified it in a way that I could turn it back into a dog house if I ever wanted to. And for me, that matters. I like having options instead of boxing myself into one use.
At the end of the day, this coop isn’t fancy, but it works. And in real life, that’s what matters most.
AI Disclosure: This post was created with the assistance of AI tools for brainstorming, editing, and organization, which helps me manage chronic pain and physical limitations during long writing sessions. All content is based on my real-life experience and is reviewed and edited by me. Some or all images in this post may be AI-generated for illustration and inspiration. Learn more about how I use AI here.
Disclaimer: Jaimie is not the great and powerful Wizard of Oz, a lawyer, a doctor, a veterinarian, or a CPA. Nothing you read in my blog is a substitute for professional advice and doing your own good research. Remember that just because someone has credentials doesn’t guarantee their advice is golden or perfect. Put your smart hat on and do your due diligence. Good luck!
Leave a Reply