If you want to can jam to preserve your fruit harvest, but for whatever reason don’t have access to a water bath canner – you still can do it!

How to Can Jam Without a Waterbath Canner – Jaimie Listens
You may be wondering, “How can I water bath can without a water bath canner?”
The good news is – YOU CAN! You just need to understand the basic principles of water bath canning and scrape up a few items you may already have on hand. If you don’t have all you need, you can usually grab what you need inexpensively.
Note: This is not a step-by-step tutorial on how to water bath can. It’s simply an effective and inexpensive work-around if you don’t have access to a water bath canner.
So, why would you even need to attempt water bath canning without an official water bath canner?
#1 – You have a glass top stove.
Some glass top stove manufacturers don’t recommend using a canner on the glass top surface. Depending on the type of water bath canner, it may not be suitable for a glass top stove. For example, the inexpensive enamel-type water bath canner label will sometimes say ” not recommended for glass-top stoves.”
The reason for this warning is when you look at the bottom of the enamel canner, you can see that it is concave in the middle. This can trap extra heat and damage the stove or canner.
I know that people do use these canners on their glass-top stoves and have never had issues, and that’s fine if you know the risks. Just be aware that it costs almost as much to replace the glass on your stove top as it does to buy a whole new stove.
#2 – You want to try water bath canning, but you’re not ready to invest in a canner just yet.
If you’re like me, you have tried lots of hobbies after investing hundreds of dollars – just to find out it’s NOT for you. That gets expensive! Especially if you have a glass-top stove and have to upgrade to a stainless steel canner – ouch!
Sometimes making due with what you have works just fine to test the water before you jump in with your wallet!
#3 – You have a small kitchen with limited space.
Canners are a big investment in storage space, so you might be looking for other options with things you already have available in your kitchen.
#4 – There are no water bath canners in stock.
Sometimes you can’t get a canner because it’s canning season and inventory is thin due to demand.
There also may be supply chain issues or interruptions that are causing a shortage. Combine an increase in demand with a shortage and you will be hard-pressed to find anything at all. Like, for example, if the supply chain ever gets nuked courtesy of a lot of “smart” people “protecting” all of us.
Supplies you will need to water bath can without a canner:

How to Can Jam Without a Waterbath Canner – Jaimie Listens
This post may contain affiliate links. Meaning I receive a small commission when you purchase from my links, at no additional cost to you… which helps me spoil my adorable rescue rabbits.
#1 – A stainless steel stock pot that’s at least 6 quarts, preferrably 8-12 quarts. If you have something larger, even better! It doesn’t have to be stainless steel, it only has to be large enough to hold a few jars and safe for your stove. The good news is that you probably already have a large stock pot!
#2 – A snug fitting lid. Using a glass lid is best, but a regular lid will work too. It will help hold the heat and cut down on water loss due to evaporation.
#3 – Some way to securely support your jars while slightly raising them off the bottom of your stock pot. Some items that work well for this are canning jar rings, a stainless steel steaming rack or the rack that came with your instant pot.
If you need to buy an inexpensive rack or insert for your pot, do try and get stainless steel since it will hold up much better and not discolor. Also, make sure to measure the bottom of your pot and subtract 1/2″ to make sure it will fit.
#4 – Thick rubber kitchen gloves. The kind you use for washing dishes.
#5 – Basic canning tools: A jar lifter, funnel, magnetic lid lifter and a de-bubbler tool. I like the de-bubbler tool I have since it also has an end that measures headspace.
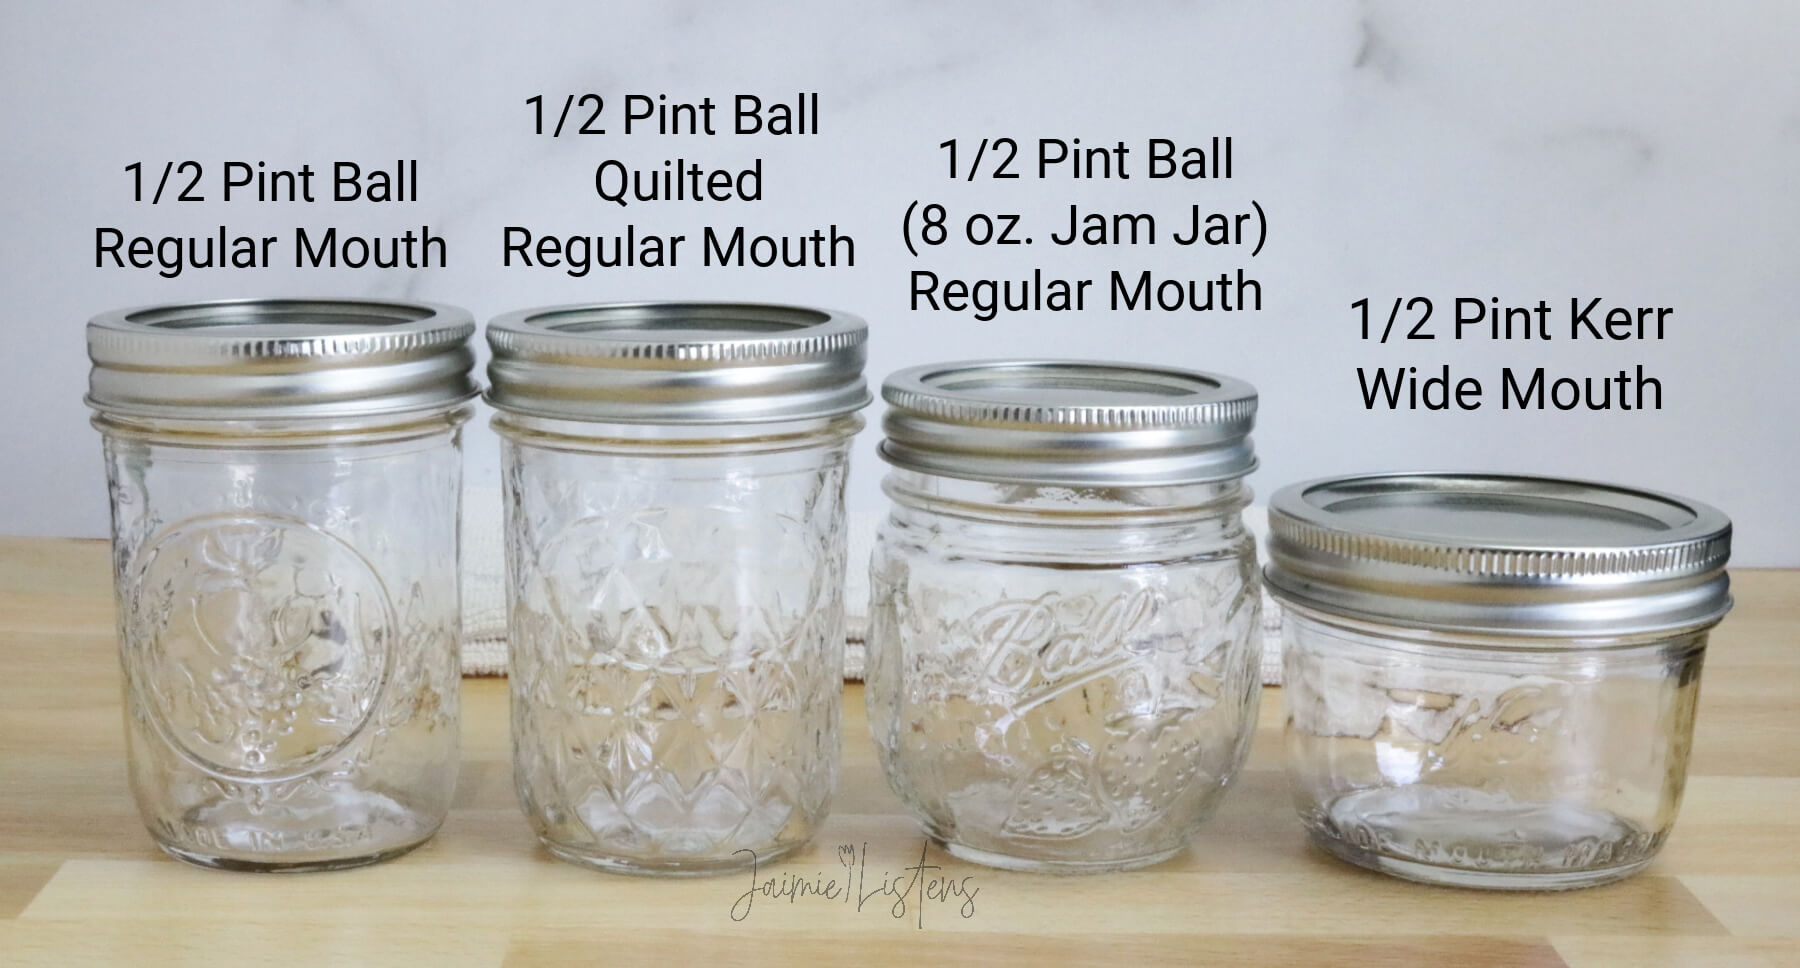
#6 – Jam jars. You have lots of options, but the stock pot you use for canning is going to “have it’s say” in what you pick.
When you shop for your supplies, I suggest looking locally first. I have found much better prices and selection that way.
Finding the right jars when water bath canning in your stock pot:
It’s important to pick canning jars that will fit your pot and still leave room to cover them with at least 1″ of water or more WITHOUT OVERFILLING YOUR POT.

How to Can Jam Without a Waterbath Canner – Jaimie Listens
If you run into the situation where you have your pot filled to the tippy-top just to cover your jars with 1″ of water, you will have a very hard time maintaining a boil and keeping the water from gushing over the side of your pot. It will make an absolute mess, even if you have your lid on.
To illustrate, when using a taller, more narrow stock pot, you will want to use jars that are taller and more narrow. Why? So you can fit more jars in your pot. It’s just not efficient to process one or two jars at a time.
If you have a wider, shallower stock pot, you will need to pick jars that are shorter and wider. Make sense?
Ideally, you will want to be able to fit 4-7 jars that are 1/2 pint in size.
Removing your canning jars from your makeshift stockpot canner:
Since you are using a stock pot to water bath can your jam instead of a standard water bath canner, your jars will end up a little closer together when canning.
This will make it much harder to wedge your jar lifter between your jars to lift them after processing. This is why you will need a thick pair of rubber gloves to get the first couple of jars out.
The trick to doing this without getting burned, is to make sure you cool your pot down to about 180 degrees Fahrenheit or less before you pull out our jars using your gloved hand. It will reach this temperature after approximately 5 minutes of cooling.
YOU WILL WANT TO BE VERY CAREFUL AND DO THIS QUICKLY.
The gloves will protect your fingers long enough to quickly grab your jar and move it to a towel on your countertop. It would also be a good idea to have an oven mitt on your other hand close by in case the jar becomes to hot or slips.
An alternative to using a gloved hand is to use a pair of tongs. They are smaller than a jar lifter. Just be careful you don’t have the jar slip and fall since they hold less securely than a jar lifter. Again, put an oven mitt on your other hand and be ready in case it starts to slip.
Video of what I covered here:
PRO TIP:
Since your pot will be smaller than a water bath canner, it will be easier to sterilize your jars in your dishwasher or oven. If using your oven, place your clean dry jars on a cookie sheet. Next, heat to 220 degrees Fahrenheit for 20 minutes. Now turn off the oven and use it to keep them warm until you are ready to fill your jars.
Is it safe to water bath can in a stock pot instead of a water bath canner?
Yes! It is absolutely safe to use a stock pot to water bath can instead of a water bath canner. The process is exactly the same. Process your jars in 1″ or more boiling water for the recommended time.
Basically, a water bath canner is an extra-large glorified stock pot.
Anything that is safe to can in a water bath canner is safe to process in a larger stock pot.
If you are ready to upgrade to a water bath canner, I am currently using this one and it works great!
I hope you found this helpful! At the time of writing this, I was finding it extremely difficult to locate any type of water bath canner. I ended up using my own every-day stock pots. Comment below if you have any tips that worked for you or you have questions!


Thanks for this info. DO you have instructions on how to actually prepare and bathe jars for jam for example?
You’re welcome, Cindi! I’m glad you found the link and I hope it was helpful!
My apologies, I see the link.
I use a pressure canner at between 2 -3 pounds pressure to simulate water bathing. (Technically your steam canning them at that low of a pressure.) I do this for the same time as water bathing. It uses much less water and much less energy. Time-wise it is about the same since you have to wait for the pressure to dissipate on its own before opening the canner. So, for a person with a pressure canner already you can simulate the water bath for pickles and jams and jellies which normally don’t have pressure canning times listed. I came here because I couldn’t remember how long to water bath jams, since we were doing that today. I just finished a batch and once I removed the lid of the canner, they all started popping right away, it works like a charm.
Hi, Dan. Interesting! It reminds me of using a steam canner for jams, and high-acid foods. It’s always nice when you can save water and energy. Thanks for sharing how you do your canning!